Sunday, October 7, 2012

Figure Salvage, part 3

I was interviewed by Pat from the 11th Company Podcast this evening, talking about this blog and my series on removing paint from old figures.  I appreciate Pat's interest in this series of articles and I hope you find the interview informative.

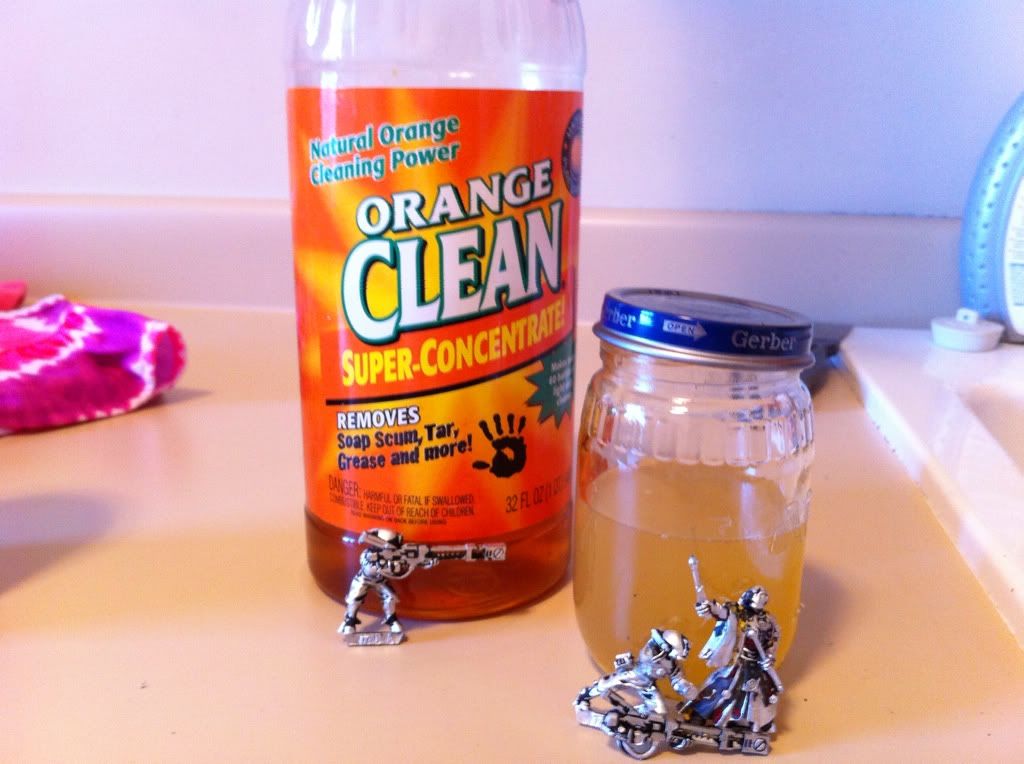
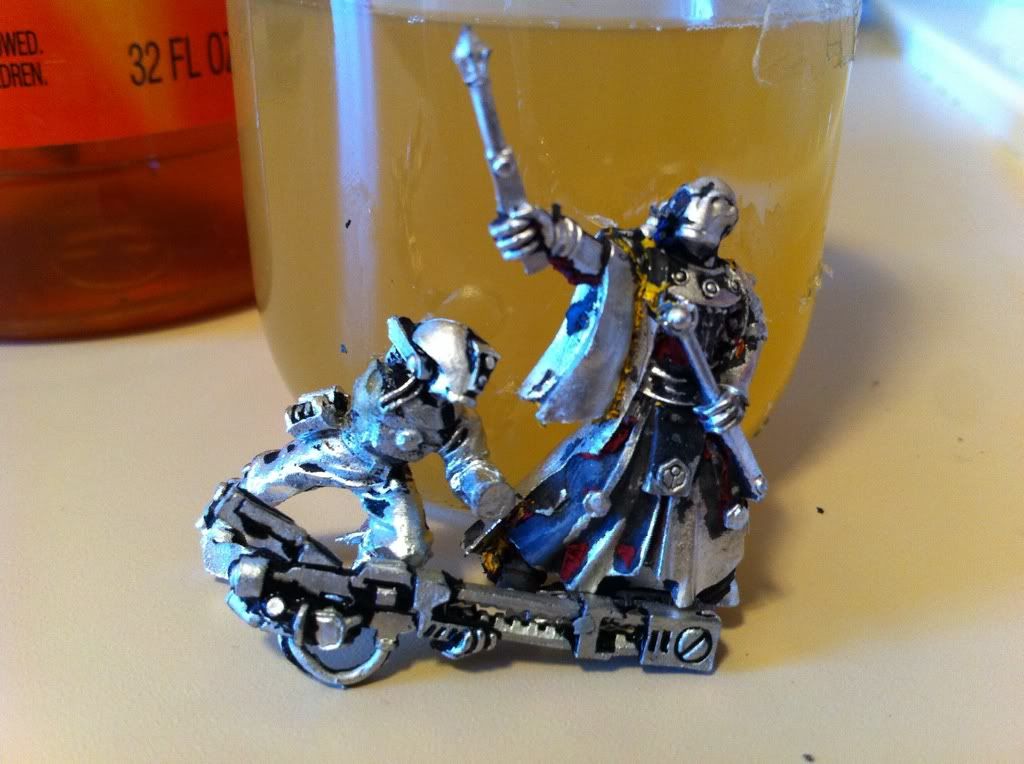
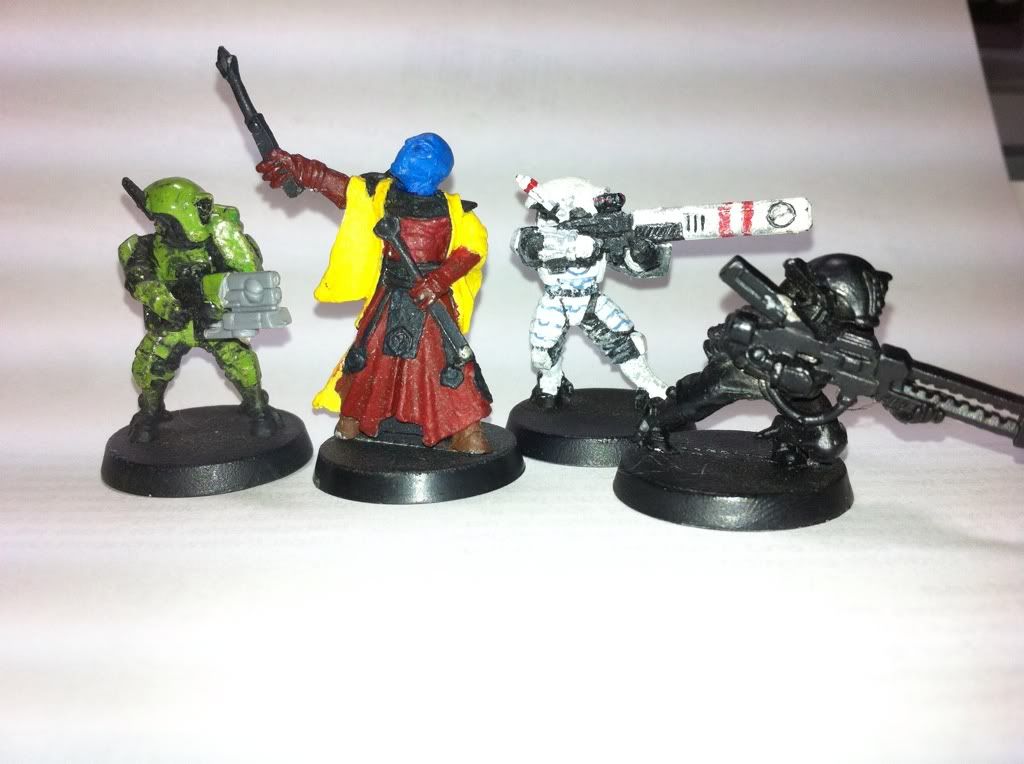
The interview brought up an interesting point that I thought I would elaborate on here.  There are a number of different chemicals out there that gamers have used with varying degrees of success for removing paint from figures.   When deciding which ones to use, you need to think about two things:

  • What material is the figure made of? Metal?  Plastic?  Resin (like Finecast)?
  • What sort of paint has been applied to the figure?
The first question is easy to answer.  Between inspecting the figure and looking at the figure company's website it should be fairly easy to figure out what material the figure is made of.  In the case of GW figures the same model may be cast either in metal (older figures) or Finecast resin (Newer copies).  If the different in heft isn't enough to figure out what material you're looking at, use a hobby knife to scrape a little paint off and see what's underneath.

The second question is much harder.  Ideally the figures in question will have been painted with purpose-specific hobby paints (Citadel, Vallejo, P3, Reaper, Some Tamiya, etc).  These are water-based acrylics and should be easy to take off.  If you're unlucky the original painter may have used enamel paints (Testors, Humbrol, Some Tamiya, etc.) which is much harder to take off and will require stronger solvents.  The wildcard will be whether or not the models were varnished.  That awesome model of a space marine captain may have been painted with Citadel paints, but then the painter covered the model with multiple, heavy coats of Krylon Crystal Clear or another durable varnish, making your job that much harder.  Often, especially when buying figures from eBay, you just don't know what you're dealing with.

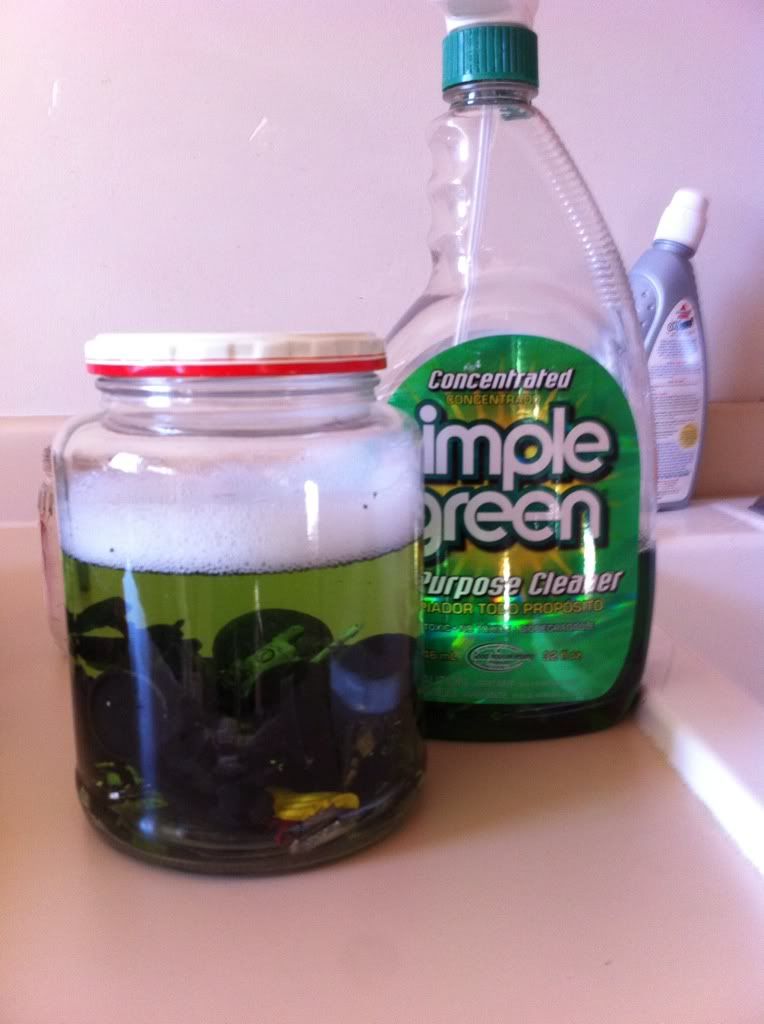
In general, I recommend using the weakest solvent you can to take paint off your figures.  Metal figures will be more tolerant of heavier-duty cleaners, but you need to exercise some care with plastic or resin.   It's a good idea to keep bits of sprue from both plastic & resin/Finecast kits around to use as testers for different solvents.  Every time you dunk a figure in a solvent you are initiating a chemical reaction where you want the solvent to interact with the paint and either dissolve it or detach it from the figure so you can take it off.  The risk is that the solvent you are using to chemically alter the paint will also chemically alter the figure the paint is adhered to.  When trying out a new solvent always try to use some piece of the material you don'r care about to see what it does.  It's much better to take a small piece of resin sprue to figure out that your new cleaner will turn it into liquid slag versus the expensive & fragile figure itself.

Gap Filling

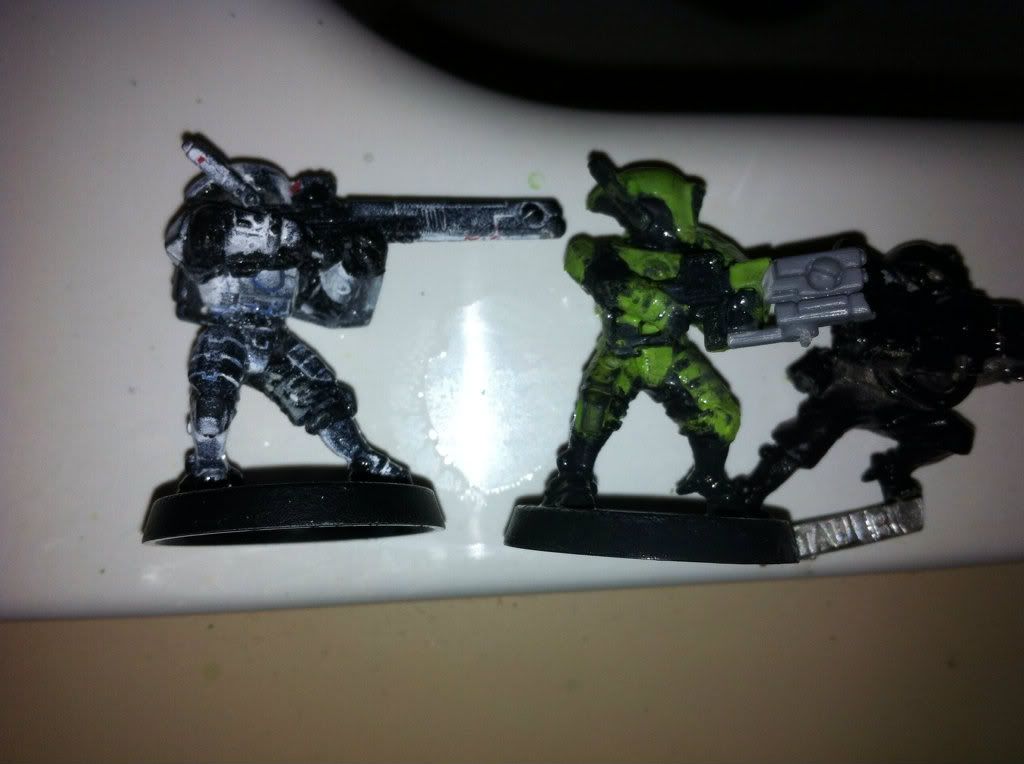
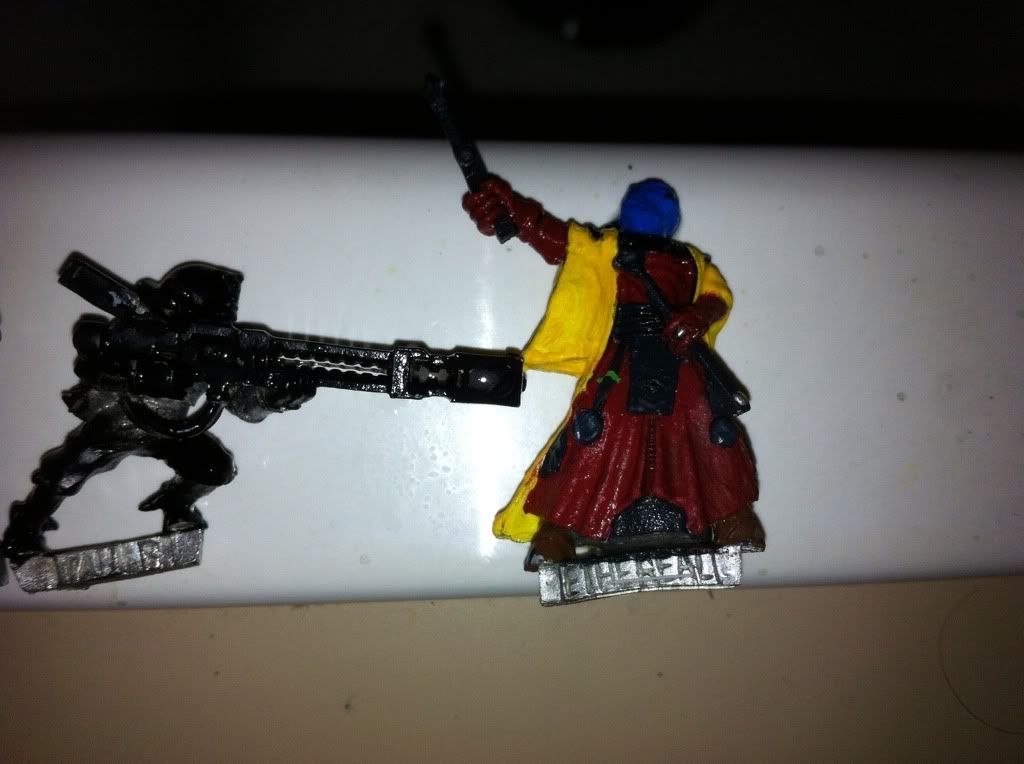
After you've removed the old paint from your figures, another good step to take is going over them to remove mold lines and fill gaps in the figures.  Odds are good that the best deals come from gamers looking to get rid of their first figures, so those figures often are put together haphazardly and the game may not have bothered to remove mold lines.  

Removing mold lines is best done with an xacto knife and/or small files.  If you're using a knife scrape, don't cut.

The other part of the process is gap-filling.  Putting together figures takes some skill, and even the best of us end up with gaps in places we don't want them.  This is true for both figures and vehicles.
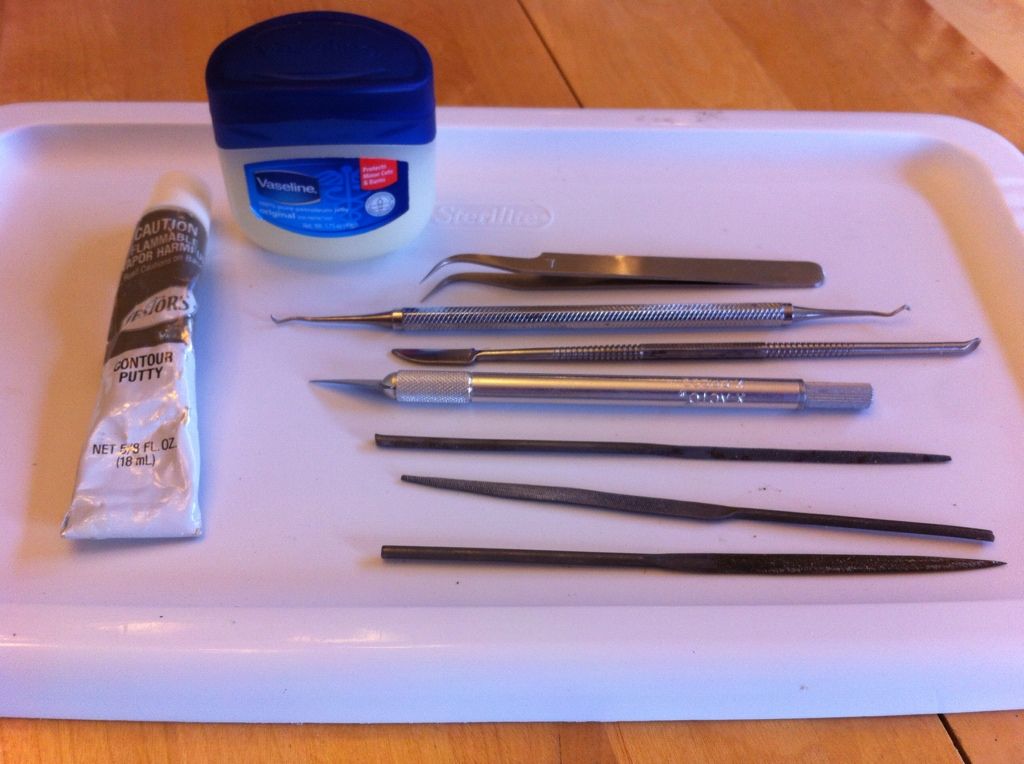
Tools of the Trade

Here are some tools I often use for this step.  The metal implements from top to bottom are:
  • Hobby Tweezers  - useful for fitting small parts and grabbing old bits of paint, stray hairs that may have been painted onto a figure, etc.
  • An old dental tool.  I got this from my grandfather's stained glass toolbox.  I think he modified it to make some interesting twists.  It's useful for scraping hard-to-reach areas.
  • A GW modeling tool.  I bought this on a whim but it's useful for applying contour putty or green stuff.
  • A Xacto hobby knife. I use older blades for cleaning mold lines off.  THe idea is to scrape the line away versus trying to cut it.  YOu can also use a duller blade as a tool for applying putty if you don't have other tools at hand.
  • An assortment of jewelers files.  These are useful for taking mold lines off, especially on metal figures.
There's also a tube of Testors White Contour Putty and a small jar of Vaseline.  The Testors putty is inexpensive and easier to work with for gap filling that either regular Green Stuff or Liquid Green Stuff in my opinion.  I use LGS a lot for smaller gap-filling & smoothing work but for larger gaps I don't find it works as well.

I use the vaseline to lightly coat the blades of the hobby tools I use when working with putty.  I find it helps keep the putty sticking to the model instead of the blade.  I'll also put a little on my finger to help smooth out the putty after applying it.  

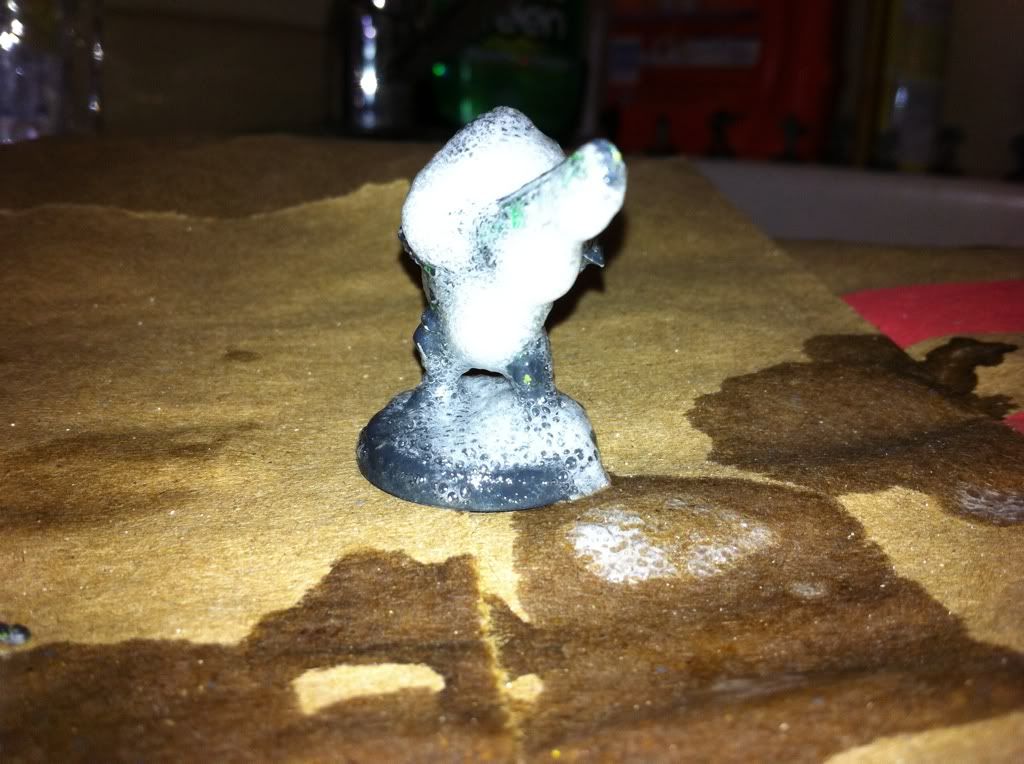
Here's a poorly-photographed example of a gap that needs to be filling.  This Fire Warrior has about a 2mm gap between the bottom of his right arm and the torso.  That looks terrible and also makes the arm joint weak since there's very little contact between the two parts.  
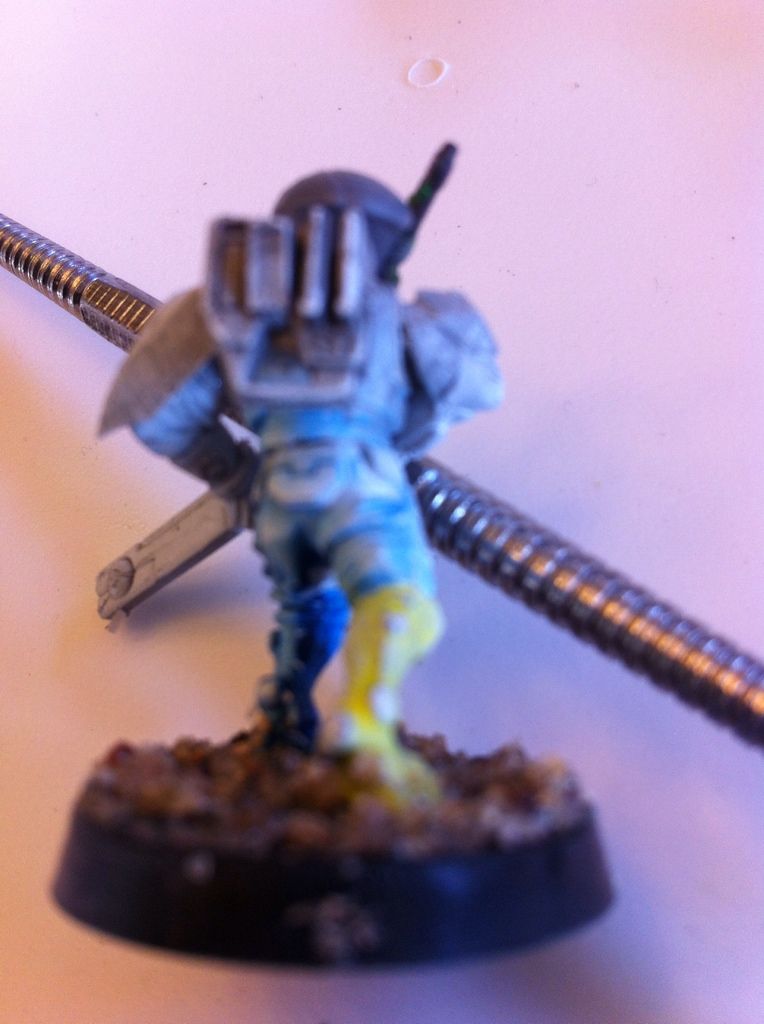
Mind the Gap

Using a little dollop of contour putty, I use a lightly-greased hobby tool to mash the putty into the joing and smooth it out.  Once it's dry the putty is also sandable if needed.
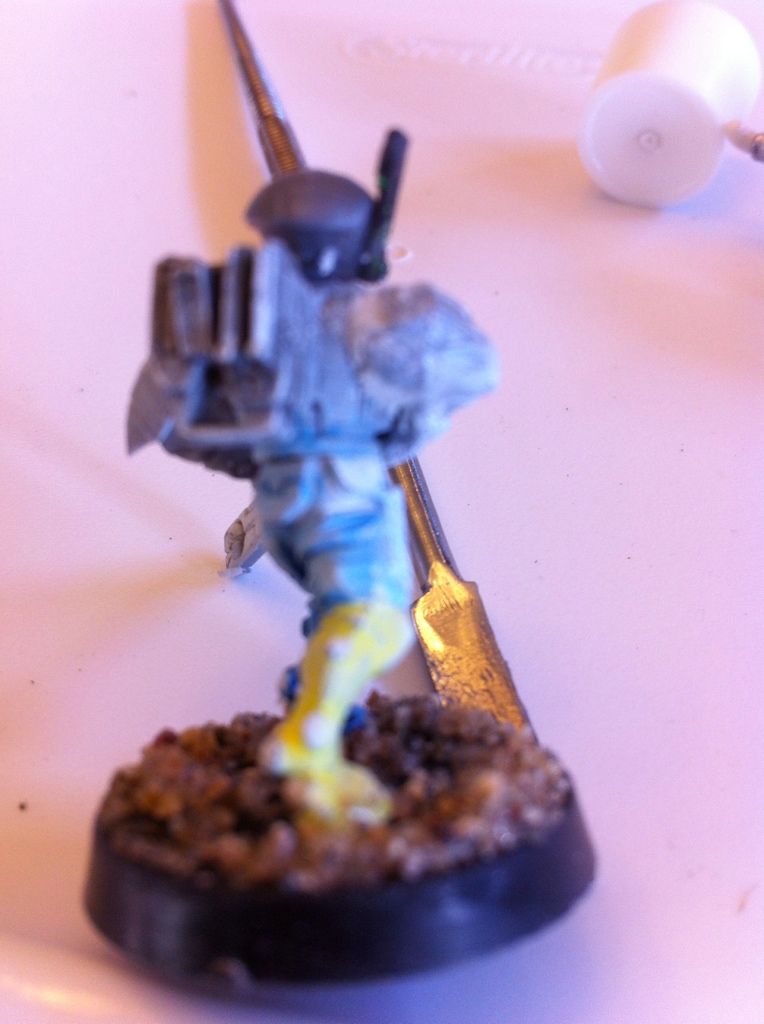
Gap Filled!
As you can (sorta) see, the white putty has filled in the gap in the arm joint, making it that much stronger and better-looking once it gets painted.   Note the light coating of Vaseline on the hobby tool blade behind the figure.  

It's apparent to me that my old iPhone isn't the optimal camera for taking close-up shots.  Something I'll have to work on eventually.  I apologize for the poor quality of the pictures but it's the best I can do for now.  If you have any other questions about putty and gap filling, please leave a comment or ask me on Twitter where my handlie is @GreatRedoubt.

Enjoy, and good gaming!


Friday, September 28, 2012

Figure Salvage, Part 2

In our last post I showed you some used Tau figures I picked up in a deal recently.  The first step towards cleaning them up & repainting them to match my army is to strip off the old coats of paint.

I started by dumping all of the figures in a pickle jar filled with diluted Simple Green.  This did an OK job in some cases, but a lot of the paint applied was not affected. I'm no chemistry expert but this is probably due to either a varnish being applied or the nature of the paint.  I would guess that something like Simple Green may not work so hot on figures painted with enamel-based paints vs acrylics.  If you get figures from anyone that uses hardware store spray paints this will often be the case.

Here are shots of the figures after 24 hours in Simple Green:

Plastic Fire Warriors after Simple Green
As you can see, some paint came off but most of the green & white top coats are still intact.  I had a few other figures where the Simple Green took off enough paint to call it good, but in these cases, the paint is applied thick enough that it obscures some of the finer details in the armor so we have to go further in getting these figures ready for repainting.

The metal figures were even worse.  You can hardly tell any difference.

Paint still basically intact on the metal figs
I was able to scrape off some of the raised bits on the metal figures but again, this is not nearly good enough.

Note:  Many gamers have good luck with Simple Green.  Using it undiluted and letting it soak longer may give you better results.  I'm impatient and also wanted to show what some other common household cleaners can do so I moved on.

With Simple Green not cutting the mustard for me, I moved on to the next cleaning solution.  Citrus-based cleaners & degreasers are still pretty non-toxic and are more powerful than cleaning solutions like Simple Green.  I made a solution of 1:1 Orange Clean & water, put it in a glass baby food jar (very useful by the way) and let my figures soak in there for between 15 minutes and an hour.

My metal figures came out very shiny and clean with some scrubbing.

Here's a close-up:
Where'd all that paint go?

Still some bits of paint on there but for the most part the citrus cleaner allowed my to get most of the paint off with a short soak.  I left the metal figures in there longer and they got very clean.  See the picture at the end of this post to see the final state.  They're very shiny.  

There's an important caveat to remember when using Citrus-based cleaners.  They're usually sold as 'de-greasers' for a reason:  They are very good at sucking oil out of something, and that something includes both your skin and plastics.  So, use gloves if you don't want your fingers to turn white, crack and burn for a while.  Also, there are disclaimers against using citrus-based cleaners with plastics like styrene (what GW plastics are made of) for again they chemically alter the plastics.  I took a few busted plastic figures and left them in the citrus cleaner for about 30 minutes.  When scrubbing the paint came off, but the figures got bendy and the plastic bases had started melting, so my toothbrush started scraping bits off the base and I managed to leave fingerprints embedded in both the top & bottom.  If this is all you have for cleaning figures, you can use it, but do not leave your figs in the mix for a prolonged time or you will end up with a jar full of goo.  There are better options.

After seeing a bunch of plastic figures still coated in gloppy paint, I decided it was time to pull out the heavy artillery: spray-on oven cleaner.  I use Easy-Off Heavy Duty Oven Cleaner.  I sprayed it on my plastic figures and let them sit for 10-20 minutes and then started scrubbing them under warm water with my trusty toothbrush.

Tau Fire Warrior enduring the Rot of Nurgle (i.e. Oven Cleaner)
Another safety note:  Oven Cleaner will take off pretty much anything given time, but it's toxic, nasty stuff.  Wear gloves at all time as this will  dry out and burn your skin, work in a well-ventilated area as the fumes from the spray could be classified as chemical warfare (you'll be hacking a lot if you breathe it in), wear old clothes you don't care about and work in an area where you or your significant other won't lose their mind from all the nasty chemical crap you'll be scattering around while you're scrubbing.  If you do this in a bathroom or kitchen sink, you'll be sorry.  Don't complain back to me about it, you've been warned and I'll just mock & ridicule you.

Anyway, while Oven Cleaner should probably be banned under the Geneva Convention it's pretty damn effective and loosening up paint without mutating the plastic underneath.  Here's what my figures looked like after being scrubbed and rinsed:


Now we're talking!
Are you can see, most of the paint is now gone.  This brings up an important point.  When you're buying used figures, you need to keep your expectations realistic.  Getting all the paint off of plastic figures is almost impossible, so you are aiming to get most of it off.  The idea is to get enough paint off to make sure the details stick out and you can put some serviceable figures on the table.  If you're looking to do Golden Demon-quality work, you're better off buying new figures.  These Fire Warriors will die in droves on the table.  If you have some that don't end up looking so hot, take advantage of the new casualty allocation rules in 6th edition and put the uglier figures up front so they won't offend your sensibilities for long in a game.

Scrubbing the figures down and soaking them in a variety of chemicals may mean the finer detail bits of plastic figures may snap off.  I lost a number of Tau helmet antennas during cleanup.  Thankfully I have some spares and also a plethora of those left hands holding a communication device.  I can snip off the antennas from those arms and use them as proxy pieces.  Won't be perfect, but again the butt-ugly ones will end up as bullet-takers in the front ranks.

So, here are our 4 figures after paint removal.  The metal figures are nice and shiny and after re-basing and cleaning up mold lines, they will look good as new.  The plastics look more dodgy right now but after doing some more scraping and re-priming them they will look pretty good (hopefully - time will tell).

Time to move on to rebasing, cleaning mold lines, etc.

The final step: Clean up after yourself.  The process of scrubbing paint off will leave little flecks of dark  goop all over your work area.

PS: Galan from the Hitting on 3's podcast told me he likes "LA's Totally Awesome Cleaner," for stripping paint off of figures.  It's cheap and can be found in dollar stores around the USA.  Just another option for you to look at.  Thanks Galan!


Wednesday, September 26, 2012

Figure Salvage, Part 1

Everyone likes saving money when they can, especially on non-essential things like hobbies.  While miniatures gaming is a relatively inexpensive hobby (compared to something like Golf,  motorsports, etc.) it still requires a decent outlay of cash, and for some gamers, the less they have to spend the better. I come from a background of historical miniatures, where paying $3 for a very well-sculpted 28mm miniature is seen as highway robbery, so you can imagine my shock when jumping back into 40K and paying $15 for a Tau Shas'ui NCO & shield drone.  You need less figures for a GW army but still... damn.

As I was saying, gamers like to save cash, and one way people do that is by buying used figures.  There are many places you can get good deals online on used figures including eBay, Bartertown, various message board swap fora.  Another place you can pick up deals is from other gamers in your local group.  I was at my FLGS last night and struck a deal with another local gamer.  For $40 (which he promptly turned into two Grey Knight leader figures from the store) I got the following:
  • 1 Metal Tau Ethereal
  • 2 Metal Tau Pathfinders with Rail Rifles
  • 5 gun drones
  • 22 Assembled Fire Warriors
  • 6 Assembled Kroot
Not too shabby, and a hell of a lot cheaper than buying every thing new.  

$40 of Used Tau.  Note the irregular paint jobs.


Disclaimer:  I buy most of my figures from my FLGS.  He's not running a charity to provide free gaming space for us so I support him as much as I can.  If you like your local gaming store, buy things there regularly.  It's a tough economy and these small business owners need support from ALL of us to stay in business. It's OK to get good deals on stuff elsewhere, but if you buy all your stuff online and then go into a local store to play and never buy anything there, you're just a leech.  </soapbox>

But I digress.  So, I managed to get a good deal on some things I needed for my force.  These Tau were the first figures this gamer had ever painted and, in all honesty, it showed.  Mold lines still in place, haphazard assembly in some cases, and the paint was laid on thick, and sometimes with a grainy finish. Those figures that were painted were done in several different color schemes, none of which are close to the one I'm using.  This is pretty common with used figures.  The better the deal, odds are the worse shape the figures are in.  Cleaning them up can be a pain, but that's the price you often pay to save some bucks.  So, I decided to go through and clean the figures up and I thought it might be interesting for newer gamers especially to see how I did it.

Here are 4 figures I'll use as my test cases for this series.  We have a Tau Ethereal, a black-primed pathfinder with a BFG rail rifle and two Tau Fire Warriors.  The white Fire Warrior has a grainy, chalky white coat of paint over a black primer base while the green one has been coated in 'realistic water effect' to give it a shiny, plasticky look & feel.  In all cases the based are plan.  No paint, terrain, etc.  

The Usual Suspects

The first thing that needs to be done is get all the old paint off.  There are a variety of ways to get the paint off.  Sometimes running them under hot water and then using an old toothbrush works, but often you have to soak the figures in something to get the paint off.  For metal figures, oven cleaner spray works very well, but it's toxic and I don't know how well it would work with plastic figures, let alone resin.  Automotive brake fluid will also work from what I've read.  My preferred solution is using something less noxious, so I'm putting all these figures in a bath of diluted Simple Green.  This is a non-toxic cleaner that can be found at pretty much any DIY or Home Improvement store in the USA.  A somewhat similar product in the UK is Dettol from what I've heard.

So, I took an old glass pickle jar (the wide mouth helps a lot), filled it with diluted Simple Green (~1:15 ratio or so. The exact ratio doesn't matter much IMO.  I've seen it anywhere from 1:10 to 1:30.  The less SG in the mix, the longer it may take so be aware of that).  Once the mix is in place in go the figures for a soak.  I expect they'll be in there for at least a day and perhaps longer, especially for those pieces with the water effect gunk on them.  

A few days of this and most paint comes off.

After a few days of soaking in the Simple Green most of the paint will come right off with a rinse of hot water and some scrubbing with an old tootbrush.  I'll post more pics of the Fantastic Four over time to show the progress of the reclamation effort.  You can see larger photos of this series at my Photobucket account here.

More to follow...

If you find this series of posts useful please leave a comment or let me know on Twitter (@GreatRedoubt).  

Friday, September 21, 2012

The Genesis of Warhammer 40K

The Warhammer family of tabletop games has been around for a long time, with the original Warhammer 40K (aka Rogue Trader) being released in 1987.  What many gamers may not know was that some of the original concepts behind the game and the universe were formed well before that year, even before the original Warhammer Fantasy Battle rules were published.

Digging around in my basement this week I stumbled across an old set of rules I had called "Imperial Commander."  These were the mass-battle rules to accompany the "Laserburn" skirmish/RPG rules published by Tabletop Games back in the early 1980's.  I used to play IC with some friends when I was in high school & college back then, using the 15mm figure line that TTG produced as well.  The games were short, bloody and a great deal of fun.

Imperial Commander rules & Forces of the Imperium Supplement
Here are the original books in their black & white, simple card cover glory.  The copyright date on the rules are December, 1981, and the authors are Bryan Ansell & Richard Halliwell, both of whom went on to become co-authors of Warhammer Fantasy Battle (with other individuals as well), and Mr. Ansell was the founder of Citadel Miniatures and later became owner of Games Workshop and (after selling GW) Wargames Foundry.   

You can see hints of early space marines in the imagery used for the Imperial Marines here.

The troop types include armored infantry (i.e. regular space marines), powered armor (Terminators) and Dreadnoughts.  The main weapon used by the Imperial marines are the Bolt Rifle & 'Heavy Bolter' (sound familiar?).


There are references to the 'Forces of the Emperor and his Lord Knights (primarchs?)' and the Inquisition as well.


Laserburn & Imperial commander had no concept of Chaos, Orks, Eldar or any other major xenos races.  It was mostly humans being horrible to other humans with some aliens thrown in for good measure.  You can still buy the original 15mm figures and some of the Laserburn manuals at 15mm.uk

Rouge Trader was heavily influenced by further developments from GW as well, but reading through the old Laserburn material it's easy to see where a lot of the core ideas and imagery came from.  I hope you found this interesting! 


Monday, September 17, 2012

My First Game of 40K

The last month or so has not been kind to me gaming-wise.  I've been trying to get down to my FLGS on Tuesday nights for Warhammer 40K but I've been out of town working for the last 4 Tuesdays in a row.  I finally managed to make it down last Sunday (the other day o the week GW games are often played at Armored Ogre) and was able to get in a quick learning game of 40K against Jeremy, another local Tau player.

We each too around 600 points of forces since that's right around as many as I have painted up currently.  My forces included:

  • Tau Commander Crisis Suit + 2 bodyguard Crisis Suits (all with Plasma Rifle, Missile Pod & Multtracker).
  • 1 Squad of 12 Fire Warriors with Pulse Rifles including Shas'ui with Markerlight (which I forgot to use the entire game - Doh!)
  • 2 Squads of 12 Kroot with Kroot Rifles (these guys were assembled & primed white, so I'm calling them albino Kroot for now).
  • 3 XV25 Stealth Suits - Shas'ui with Fusion Blaster, other 2 with Burst Cannon

Jeremy's Forces included:
  • Tau Commander with Plasma Rifle, Missile Pod, Multitracker & drone Conroller with two shield drones.
  • Squad of 3 Crisis Suits with Plasma Rifle, Missile Pod, & Multitracker (Commander had two shield drones)
  • Two squads of 8 fire warriors with Pulse Rifles, each with 2 shield drones
  • Sniper team with 3 railgun sniper drones.
As the astute reader noticed, Jeremy took a lot of shield drones and I took none, mostly because I didn't have any painted up and I only had 1 shield drone at home.  

We rolled for the mission and came up with "The Emperor's Will", basically with each side having to try and secure an objective on the other side with 5 turns.  We played on a 4x4 board with two hills in the middle, a forest on my side and a forest/crater/difficult ground area on the opposing side's deployment area.  My objective was placed in the forest while Jeremy's was in the difficult ground area.   Overall a very symmetrical layout for both the terrain and the objectives.

Here's a picture of the game as it started.  I deployed Fire Warriors on the right, one squad of albino Kroot in the forest, guarding the objective, the other one on my left flank (out of this picture) and my drone-less Crisis suits cowering in the rear behind the forest using the Kroot as a convenient meat shield.  The Stealth Suits were kept off board as reserves.  Jeremy deployed with a squad of Fire Warriors on either end of his line, the sniper squad in the rough terrain (with a clear field of fire all the way across the table) and all 4 Crisis suits in a Wedge formation, led by 4 shield drones.
Deployment
The game started off pretty well as both sides advanced towards each other.  Mindful of the sniper squad and the Crisis Suit mob in front of me, I chose to keep my Crisis suits alive and spent most of the game moving out from behind the forest, firing at the Crisis Suits as needed, and then jumping back behind the forest to save myself from a LOT of high strength firepower.  The Greater Good would be served by surviving.   My left-hand Kroot squad started taking losses from the opposing Fire Warriors quickly, so to keep them alive I brought in my Stealth Suits on turn 2 behind that FW squad.  The Stealth Suits killed off three of the 8 fire warriors but then paid the ultimate price next turn when pretty much every OpFor Tau unit fired on them in the second half of Turn 2, leaving a dark black scorch mark where the heroes of the Greater Good had previously stood.  

On the other flank my Fire Warriors crested the hill and opened up on the OpFor FW squad, taking out both shield drones and putting those pulse rifles to good use.  I can see the advantages of several squads of Fire Warriors massing fire on a target and doing some serious damage.  My Fire Warriors ended up stuck on the hill for the rest of the game thanks to the OpFor sniper team and the pinning tests that they incurred each time they took out a trooper.

Fire Warriors on the Hill - OpFor Objection in Upper Left
In the middle my Crisis Suits played cat & mouse with the enemy Crisis Suit team, eventually picking off all the shield drones and then taking out the entire team thanks to the firepower provided by the 'Fireknife' configuration (plasma Rifle/Missile Pod/Multitracker).

Crisis Suits sneaking around behind the forest.
The game ended in a draw.  Neither of us had the ability to capture the other's objective, I killed the enemy commander, and Jeremy drew first blood by wiping out my Stealth Suit team.  Here's a picture from the end of the game.  All of Jeremy's remaining figures had hunkered down around their objective - How I wish I had some blast template weapons!


Overall I enjoyed myself.  It was a quick game, and even with the smaller table it moved well.  I made plenty of mistakes in the game but Jeremy was a gracious and patient teacher.  Thanks to him for helping me learn the basics of the game.  It was a great feeling to get a brand new army on the table for the first time in many years.  

For future lessons:  I definitely need shield drones. The Crisis Suits will be the mobile striking force of my army and they are not armored enough to survive against most other armies' heavy support.  To keep them alive I need to take advantage of their jet packs and use shield drones to burn off (hopefully) enough wounds to keep them operational for an additional turn.   

I need more Fire Warriors.  The pulse rifles are a very good weapon, and I can see that a few squads of them, with markerlight support, can put an extremely high volume of good anti-infantry fire out.  S5 is good, and with enough wounds your enemy will eventually roll a '1.'   

The Kroot were fun to play, and with a forest on the table they always have some place to go.  They are not great troops but they have their uses, and since I have 24 of them and a Krootox right now I'll find ways to get them on the table.  They died in droves, but at least the Tau had fried chicken for dinner that night.  

I have plenty left to learn but overall I'm very pleased with my first game of 40K.  


Tuesday, September 11, 2012

Review: Paulson Games' Mecha Bits

Greetings everyone, sorry for the delay in posts.  As usual that whole 'real life' thing got in the way.  Rest assured I've been working away on my new Tau army and am getting closer to being able to have a playable force ready to go.

In addition to the Tau Battleforce box I acquired to start my army, a friend (Thanks Tim!) gave me a huge box of his old Tau stuff... most of it needing some TLC and repair work but overall a lot of usable stuff.    Included in the box were a number of old Crisis Suits, including one Broadside suit. I managed to put together a team of three 'Fireknife' suits with plasma rifle & missile launchers and they are in progress now.  I was really excited about the Broadside until I figured out I only had one railgun, which makes the Broadside a bit hard to field.  Since single railguns aren't easy to find I started looking around  at alternatives and heard mention of some third-party bits that might just do the trick.

Enter Paulson Games.  This is a relatively new company based out of the Chicago area that specializes in making resin parts that work well for small-scale models.  They have a range of mecha parts that will work very well for a number of different games, including 40K.  I ordered a sampler of parts to see what they look like and am posting a review of them here.

All of Paulson's parts are cast in an off-white resin.  The level of detail is very good and while there is some flash to be cleaned up it's not bad. All of the Paulson parts are shown as-is right from the mailing packet.  I didn't clean up any flash or mold lines yet.

First up, the railguns.  I ordered both the 'long' and 'short' models of the railgun.  As you can see, the 'long' version matches up with the GW railgun (Top in the picture) very well from a length perspective. I actually like the Paulson railgun better as it looks like it has more heft and appears more like a true heavy weapon.  Reminds me more of the long AT guns from World War II.

Railguns
Next, here are the missile launchers.  From top to bottom we have the Paulson 'underslung' launcher, the Paulson regular launcher and the GW Broadside arm launcher at the bottom.  The front of the Paulson launcher is a separate piece and is shown at the bottom in front of the GW launcher to show the width of the overall piece.  The launchers are about the same height but roughly twice as wide as the GW ones.
Missile Launchers


I also ordered some Autocannons and compared them to the GW Tau Burst Cannons. The Paulson cannon is the top one, with the separate front shown for detail.  The two halves of the GW burst cannon are below.  Again, the Paulson autocannon feels more like a true heavy weapon to me.

AutoCannons

Finally, I ordered some alternate heads as well.  Paulson offers two slightly different models of heads and they are compared here to a stock Crisis Suit head.  They will be a nice alternative to the stock GW heads, possibly to show newer suit models or field modifications.  The Paulson models are on the left & center of the two following pictures, with the GW head on the right.  

Front view
Heads - Front View

 Side view
Heads - Side View

The verdict? Overall I'm very pleased with the parts.  They have good detail, a reasonable amount of flash, good prices and excellent shipping rates worldwide.  I'll be ordering more parts over time and hopefully they will keep on expanding their range of products.  As of this writing they have their entire inventory on sale 30-50% off so if you're interested in checking out their stuff order soon! 

Saturday, August 11, 2012

A few updates

Real life intrudes and keeps me from crafting large blog posts let alone figures.  Apologies for the delay in a second post.  Work has heated up for me along with the summer youth sports season, which has meant my Tuesday night forays to Armored Ogre have been delayed until September.  In the meantime,  here are a few notes about what I've been working on.

I was sent to San Jose, California for training a few weeks back, and while I was out there I ventured to the local Games Workshop store in nearby Campbell, mostly for curiosity's sake since there are no GW stores around me and I haven't visited one since vacationing in England 12 years ago.  

From what I can tell not a whole lot has changed.   The GW store was only one mall slot wide and very deep, so entering the store felt somewhat like entering a tunnel.  As is usual for a game store there were a handful of regulars in the back gaming area painting figures and chatting about gaming with the store staff.  Upon my entry to the store I was set upon by a friendly-if-overly-earnest store employee who proceeded to interrogate me enough to figure out why I was there and then push the proper product on me.  I managed to leave only having purchased a White Dwarf magazine which is a hell of a lot more expensive than the last ones I purchased 8-9 years ago.  Sadly, the content has decreased in quality as well in my opinion.  I miss the days of Paul Sawyer editing... 

I made the mistake of asking the GW employee about the new 'munitorum' dice for 40K and was steered right there and given the hard sell about them being limited edition, once they're gone they're gone, yadda, yadda. They were expensive and to my middle-aged eyes looked hard to read so I passed on them.  One can only hope that my future games don't decrease in satisfaction due to this.

After getting back home I've managed to work on my Tau figures.  I hate using unpainted figures so I've been earnestly trying to build and paint the units out of my battleforce box along with a box of bitz that I got from a friend at the game store.    I am working on the Vior'la sect army since their uniform looks the most 'military' to me.  With the new GW paints I've chosen Nurgling Green for the armor and Catellan Green for the cloth parts of the Fire Warrior uniform.  I like the colors but need to work on defining the borders between the colors so they don't look all washed out.   I'm experimenting with inks, washes and highlighting for this first unit of Fire Warriors so they may look a little rough when finished.  I'll just tell people they've been on campaign for a long time.  More about this in a future post.

The other fun thing I've been working on is developing my airbrush skills.  I've owned a Badger Crescendo 175 for about a year but have never broken it out to use it until I got the Tau.  I was given a busted up Devlifish model that I was able to put back together and clean up a bit and I decided to use that as a guinea pig for learning how to airbrush.  Figuring out thinning paint and PSI has been an experience but I'm making baby steps going forward.  There are a number of good tutorial videos online that I've been using to figure things out, and I'll post links to the best of them in a future post.

Whew!  Too much rambling for a 'short update' post.  I'll sign off for now and good gaming everyone!